百度人脸识别

百度人脸识别–人脸对比

主要是调用百度的接口,调用方法如下:

  • HTTP方法:POST
  • 请求URLhttps://aip.baidubce.com/rest/2.0/face/v3/match
  • URL参数:access_token,通过API Key和Secret Key获取的access_token,参考“Access Token获取

  • Header:Content-Type:application/json

  • 请求参数
    • image:必选,string,图片信息,根据Image_type来判断;
    • image_type:必选,string,图片类型[BASE64, URL, FACE_TOKEN],BASE64是对图片的二进制流的一个BASE64编码,URL是从互联网上进行下载的链接,FACE_TOKEN是人脸检测返回的标识。
    • face_type:非必选,详情看文档
    • quality_control:非必选,详情看文档
    • liveness_control:非必选,详情看文档

说明:两张图片的上传使用json格式,如下:

1
2
3
4
5
6
7
8
9
10
11
12
13
14
15
16
[
{
"image": "sfasq35sadvsvqwr5q...",
"image_type": "BASE64",
"face_type": "LIVE",
"quality_control": "LOW",
"liveness_control": "HIGH"
},
{
"image": "sfasq35sadvsvqwr5q...",
"image_type": "BASE64",
"face_type": "IDCARD",
"quality_control": "LOW",
"liveness_control": "HIGH"
}
]

在调用接口之前,需要编写一个压缩图片的方法,因为以上接口对图片大小有限制。

压缩图片代码:

1
2
3
4
5
6
7
8
9
10
11
12
13
14
15
16
17
18
19
20
21
22
23
24
25
26
27
28
29
30
31
32
33
34
35
36
37
38
39
40
41
42
43
44
45
46
47
48
49
50
51
52
53
54
55
56
57
58
59
60
61
from PIL import Image
import os


class CompressPicture(object):

# 获取图片文件的大小
@staticmethod
def get_size(file):
size = os.path.getsize(file)
return size / 1024

@staticmethod
# 拼接输出文件地址
def get_outfile(infile, outfile):
if outfile:
return outfile
dir, suffix = os.path.splitext(infile)
outfile = '{}-out{}'.format(dir, suffix)
return outfile

@staticmethod
def compress_image(infile, outfile='', mb=150, step=10, quality=80):
"""
不改变图片尺寸压缩到指定大小
:param infile: 压缩源文件
:param outfile: 压缩文件保存地址
:param mb: 压缩目标,KB
:param step: 每次调整的压缩比率
:param quality: 初始压缩比率
:return: 压缩文件地址,压缩文件大小
"""
o_size = CompressPicture.get_size(infile)
if o_size <= mb:
return infile, o_size
outfile = CompressPicture.get_outfile(infile, outfile)
while o_size > mb:
im = Image.open(infile)
im.save(outfile, quality=quality)
if quality - step < 0:
break
quality -= step
o_size = CompressPicture.get_size(outfile)
return outfile, CompressPicture.get_size(outfile)

@staticmethod
def resize_image(infile, outfile='', x_s=1376):
"""
# 修改图片尺寸
:param infile: 图片源文件
:param outfile: 重设尺寸文件保存地址
:param x_s: 设置的宽度
:return: 返回修改后的图片地址
"""
im = Image.open(infile)
x, y = im.size
y_s = int(y * x_s / x)
out = im.resize((x_s, y_s), Image.ANTIALIAS)
outfile = CompressPicture.get_outfile(infile, outfile)
out.save(outfile)
return outfile

人脸对比接口调用完整代码:

1
2
3
4
5
6
7
8
9
10
11
12
13
14
15
16
17
18
19
20
21
22
23
24
25
26
27
28
29
30
31
32
33
34
35
36
37
38
39
40
41
42
43
44
45
46
47
48
49
50
51
52
53
54
55
56
57
58
59
60
61
62
63
64
65
66
67
68
69
70
71
72
73
74
75
76
77
78
79
80
81
82
83
84
85
86
87
88
89
90
91
92
93
94
95
96
97
98
99
100
101
102
103
104
105
106
107
108
109
110
111
112
113
114
import requests
import json
import base64
from CompressPicture import CompressPicture


class FaceDistinguish(object):

""" 自己申请的 AppID API Key Secret Key"""

APP_ID = '你的AppID'
API_KEY = '你的API Key'
SECRET_KEY = '你的Secret Key'
REQUEST_HEADER = {"Content-Type": "application/json; charset=UTF-8"}

# client = AipFace(APP_ID, API_KEY, SECRET_KEY)

# 用于更新token,详情见百度API:http://ai.baidu.com/docs#/Auth/top
@staticmethod
def refresh_token():
url = 'https://aip.baidubce.com/oauth/2.0/token'
post_data = {
"grant_type": "client_credentials",
"client_id": FaceDistinguish.API_KEY,
"client_secret": FaceDistinguish.SECRET_KEY
}
try_times = 0
while try_times < 3:
try_times += 1
try:
req = requests.post(url, headers=FaceDistinguish.REQUEST_HEADER, data=post_data)
except Exception as _e:
print(_e)
else:
if req.status_code == 200:
try:
result = json.loads(req.text)
except json.decoder.JSONDecodeError:
continue
return result['access_token']

@staticmethod
def generate_image_json(para_value, path_type='File'):
"""
将图片信息转换成接口指定的参数形式,根据传递的参数进行不同的操作,这里主要是处理本地文件,其他两个 暂时省略了
:param para_value: 由path_type决定对para_value做何种处理
:param path_type: File/URL/Face_Token,默认为File
:return:
"""
if path_type == 'File':
# 先把图片变为指定尺寸
out_file_1 = CompressPicture.resize_image(para_value)
# 再将图片文件压缩到指定大小
out_file_2, size = CompressPicture.compress_image(out_file_1, mb=500)
with open(out_file_2, 'rb') as f:
image_data = f.read()
base64_data = base64.b64encode(image_data)
# 需要注意的是,图片的base64编码是不包含图片头的,如data: image/jpg;base64,
image_json = {
"image": str(base64_data, 'utf-8'),
"image_type": "BASE64",
"face_type": "LIVE",
# "quality_control": "", # 设置为空,报参数格式错误,注释可以解决
# "liveness_control": ""
}
return image_json
elif path_type == 'URL':
pass
elif path_type == 'Face_Token':
pass

@staticmethod
def compare_faces(access_token, image1_json, image2_json):
"""
:param access_token:
:param image1_json: 图片一的json格式信息
:param image2_json: 图片二的json格式信息
:return:
"""
url = 'https://aip.baidubce.com/rest/2.0/face/v3/match?access_token={}'.format(access_token)
post_data = json.dumps([image1_json, image2_json])
try_times = 0
while try_times < 3:
try_times += 1
try:
req = requests.post(url, headers=FaceDistinguish.REQUEST_HEADER, data=post_data)
except Exception as _e:
print(_e)
else:
if req.status_code == 200:
try:
result = json.loads(req.text)
except json.decoder.JSONDecodeError:
continue
if result['error_msg'] == "SUCCESS":
return result['result']
break


if __name__ == "__main__":
face_item = FaceDistinguish()
token = face_item.refresh_token()
image1 = face_item.generate_image_json('tf_1.jpg', 'File')
image2 = face_item.generate_image_json('tf_2.jpg')
result = face_item.compare_faces(token, image1, image2)
print(result)

输出:
{'score': 95.77661896,
'face_list': [
{'face_token': '6b7e7f26f6dd232703ac1069420216c9'},
{'face_token': '5eb700ba38854ddfd8328386b314e7e1'}
]
}

score表示上传的两张图人脸相似度评分,face_token是两张图片的唯一标识,不同的人脸图片返回的标识不同,同一张图片多测检测返回的标识相同。如果程序无法返回正确结果,可以参照百度文档中的错误码,来修改程序中存在的问题。

如果需要安装百度aip模块,安装命令为pip install aip,如果遇到超时,使用以下命令pip install baidu-aip -i https://pypi.douban.com/simple

本质上,本次人脸识别接口学习调用已经完成了,但是我想创建一个简单的web应用,在网页中打开相应的页面选择上传两张图片,然后进行检测,所以就有了下半部分内容。

Flask 上传文件

文件上传的基本原理实际上很简单,基本上是:

  1. 一个带有 enctype=multipart/form-data<form> 标记,标记中含有 一个 <input type=file>
  2. 应用通过请求对象的 files 字典来访问文件。
  3. 使用文件的 save() 方法把文件 永久地保存在文件系统中。

web应用简单地分为前端和后端。

  • 前端页面:
1
2
3
4
5
6
7
8
9
10
11
12
13
14
15
16
17
18
19
20
21
22
23
24
25
26
27
28
29
30
31
32
33
34
35
36
37
38
39
40
41
42
43
44
45
46
47
48
49
50
51
52
53
54
55
56
57
58
59
60
61
62
63
64
65
66
67
68
69
70
71
72
73
74
75
76
77
78
79
80
81
82
83
84
85
86
<!DOCTYPE html>
<html lang="en">
<head>
<meta charset="UTF-8">
<title></title>
<style>
#test-image1-preview {
  border: 1px solid #ccc;
width: 100%;
height: 200px;
background-size: contain;
background-repeat: no-repeat;
background-position: center center;
}
#test-image2-preview {
  border: 1px solid #ccc;
width: 100%;
height: 200px;
background-size: contain;
background-repeat: no-repeat;
background-position: center center;
}
</style>
</head>
<body>
<div align="center">
<p>请选择两张图片</p>
<form method="post" enctype="multipart/form-data" id="file_upload">
  <p>图片预览:</p>
  <div id="test-image1-preview"></div>
<div id="test-image2-preview"></div>
  <p>
    <input type="file" id="test-image1-file" name="photo1" accept="image/gif, image/jpeg, image/png, image/jpg">
<input type="file" id="test-image2-file" name="photo2" accept="image/gif, image/jpeg, image/png, image/jpg">
  </p>
<p id="test-file1-info"></p>
<p id="test-file2-info"></p>
<input type="submit" value="确认提交" />
</form>
</div>
<script type="text/javascript">
upload_image('test-image1-file', 'test-file1-info', 'test-image1-preview')
upload_image('test-image2-file', 'test-file2-info', 'test-image2-preview')
function upload_image(test_image_file, test_file_info, test_image_preview){
var fileInput = document.getElementById(test_image_file);
var info = document.getElementById(test_file_info);
var preview = document.getElementById(test_image_preview);
// 监听change事件:
fileInput.addEventListener('change', function() {
  // 清除背景图片:
preview.style.backgroundImage = '';
// 检查文件是否选择:
if(!fileInput.value) {
info.innerHTML = '没有选择文件';
return;
}
// 获取File引用:
var file = fileInput.files[0];
//判断文件大小
//var size = file.size;
//if(size >= 1*1024*1024){
// alert('文件大于1兆不行!');
// return false;
//}
// 获取File信息:
info.innerHTML = '文件: ' + file.name + '<br>' +
'大小: ' + file.size + '<br>' +
'修改: ' + file.lastModifiedDate;
if(file.type !== 'image/jpeg' && file.type !== 'image/png' && file.type !== 'image/gif') {
alert('不是有效的图片文件!');
return;
}
// 读取文件:
var reader = new FileReader();
reader.onload = function(e) {
var data = e.target.result; // 'data:image/jpeg;base64,/9j/4AAQSk...(base64编码)...}'
preview.style.backgroundImage = 'url(' + data + ')';
};
// 以DataURL的形式读取文件:
reader.readAsDataURL(file);
console.log(file);
});
}
</script>
</body>
</html>

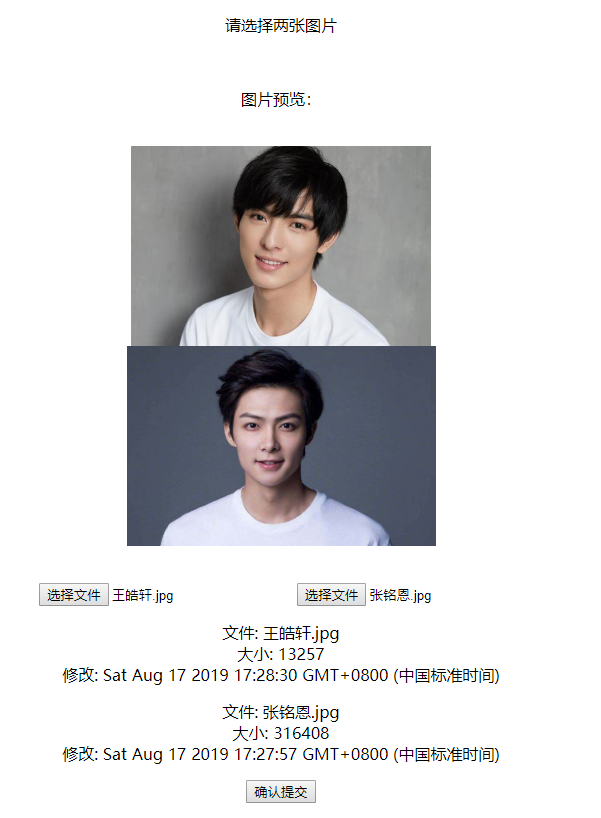
​ 因为不是做前端的,这方面实在不擅长,页面很丑,不想花过多时间去编写css,只想要达到基本的功能就Ok 了。这段代码里面还对上传的文件格式做了一定的限制(其实并没有真的限制到),也对文件的大小做了一定的限制,但是因为我们后端写了一个压缩图片的功能,所以支持上传任意大小的图片,所以注释了这部分;此外,还利用FileReader对文件的信息进行了获取。

效果图如下:

  • 后端逻辑:

    点击提交后,图片信息会被后台获取,我们要在后台做一些操作,主要是获取文件信息,保存到本地目录,然后调用上面封装的人脸识别类,进行对比,最后将识别结果显示在页面中。完整代码(index.py)如下:

1
2
3
4
5
6
7
8
9
10
11
12
13
14
15
16
17
18
19
20
21
22
23
24
25
26
27
28
29
30
31
32
33
34
35
36
37
38
39
40
41
42
43
44
45
46
47
48
49
50
51
52
53
54
from flask import Flask
from flask import render_template, request, redirect, url_for, send_from_directory
from FaceDistinguish import FaceDistinguish
import os


UPLOAD_FOLDER = os.path.curdir+os.path.sep+'uploads'+os.path.sep

app = Flask(__name__)
app.config['UPLOAD_FOLDER'] = UPLOAD_FOLDER


# http://127.0.0.1:5000/
# @app.route('/')
# def index():
# return render_template('index.html')


@app.route('/compress_result/<file1>?file2=<file2>')
def compress_face(file1, file2):
file_path1 = os.path.join(app.config['UPLOAD_FOLDER'], file1)
file_path2 = os.path.join(app.config['UPLOAD_FOLDER'], file2)
face_item = FaceDistinguish()
token = face_item.refresh_token()
image1 = face_item.generate_image_json(file_path1, 'File')
image2 = face_item.generate_image_json(file_path2)
result = face_item.compare_faces(token, image1, image2)
score = result['score']
return '相似度为{}'.format(score)


@app.route('/', methods=['GET', 'POST'])
def upload_files():
if request.method == 'POST':
file1 = request.files['photo1']
file2 = request.files['photo2']
if file1 and file2:
filename1 = file1.filename
filename2 = file2.filename
file1.save(os.path.join(app.config['UPLOAD_FOLDER'], filename1))
file2.save(os.path.join(app.config['UPLOAD_FOLDER'], filename2))
return redirect(url_for('compress_face', file1=filename1, file2=filename2))
return render_template('get_images.html')


@app.route('/uploads/<filename>')
def uploaded_file(filename):
return send_from_directory(app.config['UPLOAD_FOLDER'], filename)


if __name__ == '__main__':
# app.run(host, port, debug, options)
# 默认值:host=127.0.0.1, port=5000, debug=false
app.run()
  • render_template(),Flask默认到templates目录下查找模板文件,在index.py同级目录下,新疆templates文件夹,在里面创建需要的html文件。

  • upload_files(),先判断是否为post请求,然后利用请求对象的files字典来访问文件,文件的key值对应前端<input>的name属性,获取文件filename之后利用save()方法保存。

  • os.path,为了让程序更易于迁移,这里使用了python的os模块来设置文件保存路径;

    os.path.sep路径分隔符

    os.path.curdir指代当前目录(‘.’)

    os.oath.pardir指代上一级目录(‘..’)

    上面代码中os.path.curdir+os.path.sep+'uploads'+os.path.sep在windows中表示的目录是.\\uploads\\,所以在我们程序的同级目录下需要有一个uploads文件夹,这个不会自动生成!

  • url_for(),操作对象是函数,而不是route里的路径,比如这里跳转到compress_face()函数,并且可以传递参数,传递的参数要在函数的route()里面用”<参数>”括起来,路径要保证合法性

  • uploaded_file(),用来将本地文件在浏览器中显示。
  • compress_face(),获取上传的文件保存后的地址,读取图片信息,调用上面封装的人脸识别的类的方法,返回相似度(score),然后显示在浏览器中。